Replace or change a broken laptop display screen

How to replace or change a broken laptop display screen ?

Whether you have a broken, cracked, dead or burned pixel display screen you will think about to change it or rather be by yourself and that’s why i make this tutorial to show you how you can easily change your broken or dead display screen by yourself with just using a screw driver.
If your laptop’s display doesn’t show you anything that doesn’t mean your display got dead you’ll have to make sure about your screen by connecting it to another external monitor.

So let’s see

Either you have a LCD or LED display in your laptop, the procedure is same for every type or screen. So watch and read this tutorial carefully and repeat the steps which we shows you.
Step 1- Switch OFF Power
The first thing is to do is turn off your laptop, remove the power adaptor cable and battery also.
1 laptop power and battery remove
Step 2 – Removing Rubber Protector
Remove the rubber cover by the help of your nails which was pasted on screws.
2 remove rubber cover bezzel
Step 3 – Remove the Screws
Remove the screws by using screwdriver. If you don’t find any of screws on the display cover then  you can skip this step and move on to next.
3 remove display screws
Step 4 – Open the Casing
Open the display case by the use of your finger nails and a flat screwdriver.
4 remove the cover display
And after that unmatched the base cover.
5 laptop display dissassembley
Step 5 – Remove the Frame Screws.
6 remove frame screws
Step 6 – Remove The Hinge Screws From The Left And Right Side, Both.
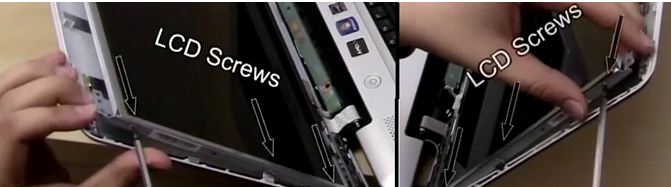
7 remove hinge screws
Step 7 – Remove the Video Connecter
Laydown the screen on the keyboard and remove the video connecter
 8 video connector
Step 8 – Remove the CCFL Power Connector
Disconnect the CCFL power connector from the bottom of your LCD screen. If you having a LED screen then you’ll never able to find that power connect because the led doesn’t need it and it’s also not possible to install LED in the place of LCD.
9 remove ccfl power connctor
Step 9 – Install the New LCD/LED
Now install the new LCD or LED and reconnect the video cable and CCFL power connector.
10 Install the New LCD LED
Step 10 – Install the Screws Back to the Hinge and the Frame
11 remove hinge screws
12  install the frame
Step 11 – Reattach the Display Case and Install Back the Screws
13
Step 12 – Testing
Now you’ve done with the installation of your display screen. Plug back the battery and turn on your laptop.
14
Enjoy........NCTTS

How To Find And Download Our Computer, Laptop, Printer & Pc Hardware Drivers

How To Find And Download Our Computer, Laptop, Printer & Pc Hardware Drivers?

If you are searching for your laptops, desktop’s, printer’s scanner’s, webcam’s and bla bla bla drivers whatever the computer accessories you having then I’m pretty sure going to help you out by this tutorial.
I know pretty sure you are wondering about why we need to install our computer’s drivers or what are those drivers do in our computer? The answer is just a car needs a driver to move, your computer hardware also needs a driver to run itself properly. Some of hardware comes with automatic drivers installation like your pen drive, hard drive etc. but some of hardware requires to install there drivers to perform better. I think now you should know well about why we need drivers to install in our computer.
In this tutorial I’ll show you how you can easily find your computer’s hardware drivers to install or update them quickly. There are only two ways to install your computer driver, which are –
  1. Download from manufacture website.
  2. Use 3rd party software

  1. Download From Manufacture Website – By searching your hardware’s model no. into manufacturer’s website support center can easily find your latest driver to download. Some of companies also provide you automatic driver installation, they give you a software to run in your computer which will auto-detect your product and gives you a list of driver what you’ve need. Here are list of some company’s driver support portal to show you an example how your manufacture’s website looks like.
HP (Hewlett-Packard) Drivers  http://www8.hp.com/in/en/drivers.html  
  1. Use 3rd Party Software – Sometimes it’s very hard to find our computer’s drivers on manufacture’s website because mostly those companies stops supporting their old products or sometimes we got confused to know, what to do or where to click on their website, that’s why we are using 3rd party software to find and install our hardware’s supported drivers easily and I’m going to show you a great software which can helps you a lot with your driver problem and the best part is you don’t need to go visit the manufacturer website or pay money to download the supports drivers.
We are using driver identifier to show you how you can easily find your drivers. Actually we are using driver identifier because its freeware (which we all like) and this software will find all of your computer’s hardware drivers, like printers driver, scanner driver, webcam drivers and lots more. It will scan your computer and give you the list of what you’ve need or what your computer wants to update.

So let’s see how to use driver identifier

Step 1 – Download
First you’ll have to download the driver finder from the official website of driveridentifier, here’s a quick link to download  >>>>http://driveridentifier.com/download.php
1
Click on a save button to “Save File” on your computer.
Step 2 – Installation
After the download completes, double click on the file driveridentifier_setup.exe in your downloads folder. You’ll just have to do next, next and finish. That’s it.
2
Step 3 – Scanning
Now open your Driver Identifier and click on “Scan Drivers” to start the hardware scanning.
4
Step 4 – Download Drivers
Now you will see your browser is open to shows you the list of your hardware’s supported drivers. Click on download or update to download the particular driver.
Driver Identifier
Enjoy..........NCTTS

How To Completely Erase And Wipe A Hard Disk Drive ?

How To Completely Erase And Wipe A Hard Disk Drive ?

format-or-erase-a-hard-drive

Note: Tutorial is also for corrupted hard disk repair solution.
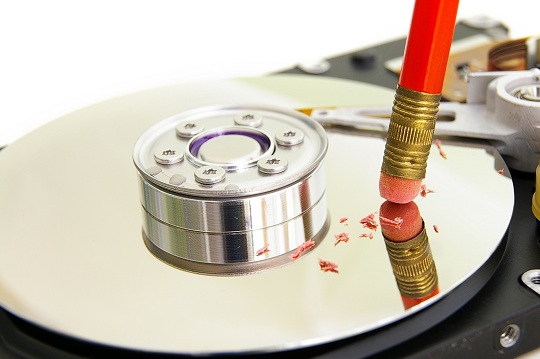
Did you know deleting file isn’t enough to completely erase or shred a file from your hard disk (HDD)? When your operating system delete’s a file or folder, it is only remove and hide that file reference and header to make it unreadable and create a free space in your hard disk to store something else. That means your file is still live in your hard disk after deleting and you can recover it until you’ve overwrites something on the recent blank space of that file.
Why use disk wipe?
Yes! Deleted file can be recoverable if you don’t wipe your hard disk completely and that’s bad if you’re selling or given your computer or laptop to someone else, which you don’t want that person will access your private data in future. Other that selling sometimes deleting and overwriting data in Hard disk for long time may also cause of slow data transformation or corruption of your drive and then it needs to get wipe because of collected collection of data bad sector.
What does disk wipe do?
Disk wipe is a loop process of overwriting data on your hard disk which cause permanently removal of data.
How to use disk wipe?
Normally there are lots of software available on the internet which can provide disk wipe utility free or paid in order to fulfill customer’s needs but in this tutorial I’m going to show you a free and effective software called dban (Darik’s Boot And Nuke) which can erase and remove all your data and collect bad sector from your Hard disk and make it clean as new.
Note: Take a backup of all your data if needed or otherwise it will gone forever. 
Step 1 – Download dban latest version from official website link given below.
Step 2 – Make a bootable disk of recently downloaded dban’s iso file
Step 3 – Boot dban cd (start your computer with dban’s cd) by quick boot menu or manually configured “Dvd-Drive” as first boot device.
Step 4 – Now you’ll able to see “Dban’s Main Screen” on your computer. Just press enter to continue.
dban main screen
After when some process done you’ll able to see your Harddisk listed in the disk & partition column. If your hard disk isn’t listed there that means you having a problem with your Hard disk or maybe this software wont supports your Hdd .
dban main screen 2 with harddisk
Step 5 – Press “M” key to show wipe methods.  You can also use my recommend method listed below according to your use.
Quick Erase – Select quick erase if you want to format and wipe your data quickly and this method will only perform a single wipe pass and I won’t recommend this because a single pass wont effects very much for you hard disk to be erased completely.
DoD Short – Mostly this method is most famous and also works great if you just want to erase data.
DoD 5220.22-M – This method is more effective that above one and also more time consuming so, only select this method if you needed because it will take hours to complete.
disk wipe methods
Step 6 – Now press “Space” to select your drive and after that press “F10” to start disk wiping.
dban formating
After the wiping fully completes, remove the dban’s bootable cd and restart your computer and now all your data is gone.

 PHYSICAL DAMAGE

If you think your data is too important and you don’t want to make it leaked then it’s better to keep your drive with yourself or you can physical damage the Hdd if the data is also won’t safe with you. You can use a hammer or a drill machine to break your drive.
hardisk break to prevent data leak
Enjoy.............NCTTS